Step by step guide to downloading and unzipping
custom stuff
(levels,
houses, models, backgrounds & textures)
In this tutorial I'll try to explain how to get all the cool custom stuff in Return to Wonderland Deluxe Platinum Edition to work. It's probably going to sound like a lot of work, but once you have mastered the technique, I'm sure you'll find it a lot less time consuming than you imagine. And what you get is awesome :-)
Step 1 - getting your computer ready for the custom stuff
Locate you Return to Wonderland Deluxe folder on your computer. A typical location is c:\games\Return to Wonderland Deluxe\. Now opening the folder you should see something like this:
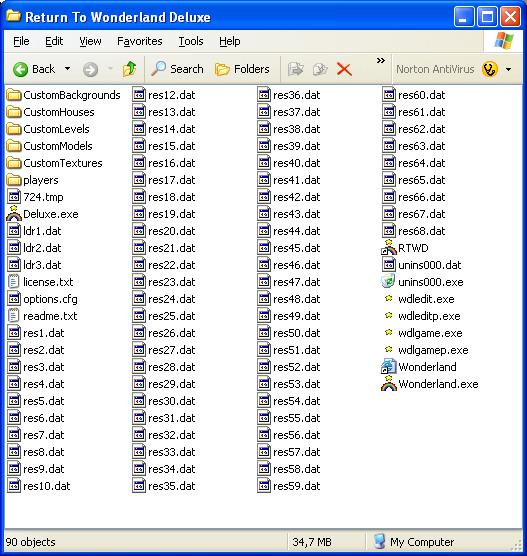
Make sure you have all the following folders: CustomBackgrounds, CustomHouses, CustomLevels, CustomModels and CustomTextures. If you don't have them, you'll have to create them. Do this by right-clicking somewhere in the window, choose "Create New Folder" and rename the new folder appropiately. Note that it is very important that the name of the folder is typed excactly as shown in the picture above. Otherwise it will not work. Step 1 only need to be followed the first time you download custom stuff.
Step 2 - downloading from the forum (or my website)
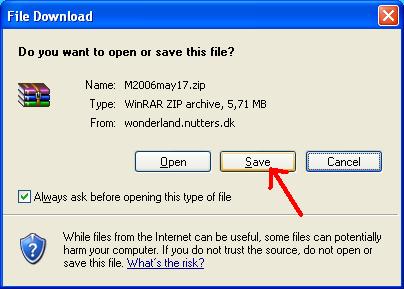
When you download, all you need to remember is to download levels into the CustomLevels folder, houses into the CustomHouses folder, textures into the CustomTextures folder etc. When downloading a .zip file you'll be asked if you want to save or open the file. Choose "save" and choose the appropiate location
.
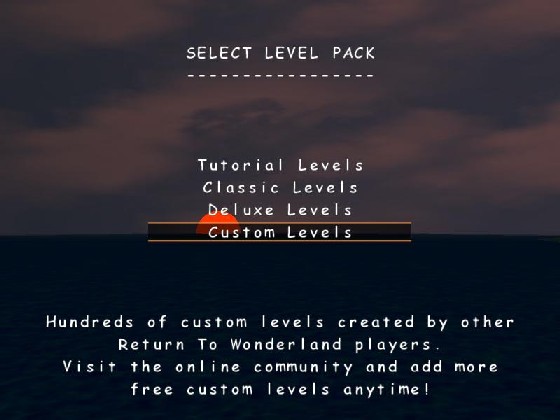
If you downloaded a level with no further custom stuff, the level is now ready to play. Simply start up Return to Wonderland Deluxe and choose to play Custom Levels and you should find your newly downloaded level there. Note that you can make subfolders in the CustomLevels folder to keep the levels organized any way you want. Never put more than 999 levels in one folder though. The game cannot handle it and will crash.
If the level has houses, models, texture or background, you also need to follow step 3.
Step 3 - unzipping houses, models, textures, backgrounds and levelpacks
The procedure for unzipping all the different custom stuff is basicly the same regardless what it is. I'll make an example with a background. Let's say you just downloaded starb.zip into your CustomBackgrounds folder. Go to your CustomBackgrounds folder. You'll see something like this:
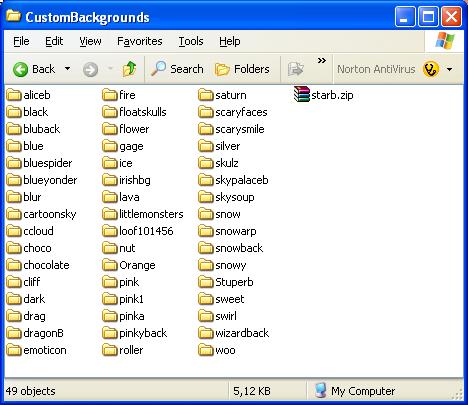
Your folder is probably completely empty except for the file you just downloaded. Now right-click on starb.zip and choose "Extract here" (see below).
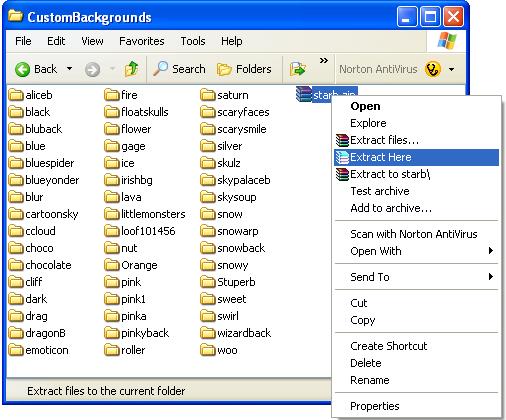
I use WinRar to unzip, but it should work just about the same if you use WinZip. Once the extraction is complete, your CustomBackgrounds folder should now have a new folder called starb. You can delete starb.zip now. To make sure everything went OK, go to the new starb folder. It should only contain a single file: back.jpg, like this:
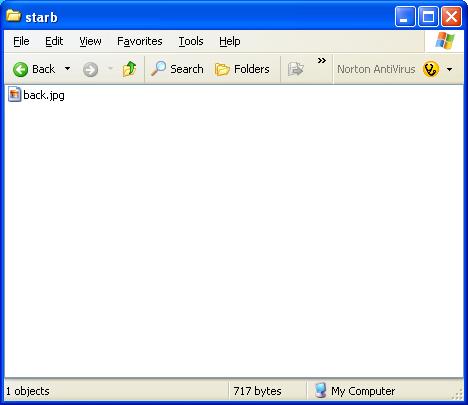
If instead there is a folder called starb within the starb folder, you have encountered what is known as "the double folder problem". To overcome this, go to the innnermost folder in the starb folder and copy the file back.jpg. Place the copy in the outermost starb folder and delete the redundant folder, so you end up with only the back.jpg in the starb folder (as shown above).
The starb background is now good to go.
The procedure for
houses, models, textures and levelpacks are just the same. Only difference is
the folder in which to find the .zip file and what contents to expect within
the created folder.
|
TYPE OF CUSTOM STUFF |
IN FOLDER |
NEW FOLDER CONTAINS |
|
Houses |
CustomHouses |
Up to 4 .jpg files named
house1.jpg, house2.jpg, house3.jpg or house4.jpg. |
|
Models |
CustomModels |
Up to 4 .3ds files named
model1.3ds, model2.3ds, model3.3ds or model4.3ds plus a varrying number of
.jpg files with random names. |
|
Textures |
CustomTextures |
Exactly 13 .jpg files
named break.jpg, floor1,jpg, floor2.jpg, floor3.jpg, floor4.jpg, sign.jpg,
wallside1a.jpg, wallside1b.jpg, wallside2a.jpg, wallside2b.jpg,
wallside3a.jpg, wallside3b.jpg and walltop.jpg. |
|
Backgrounds |
CustomBackgrounds |
Exactly 1 .jpg file
named back.jpg. |
|
Levelpacks |
CustomLevels |
A randon number of .lev,
.lv5 or .lv6 files often arranged in subfolders. Never put more than 999 levels
in one folder. |
If you download a .zip file containing more than one model, house, texture or background the procedure is the same. You will just get more than one new folder when unzipping.
When you have succesfully unzipped all the custom stuff you're ready to
PLAY WONDERLAND AND ENJOY ALL THE AMAZING CUSTOM STUFF :-)
I hope you will find this little tutorial helpful.
Back to the Nutters Wonderland Homepage