How to make and post screenshots
When you play the
level in question, use alt-x to get the best view of the situation:
Alt-x-1 tilts the level down (frog-view)
Alt-x-2 moves the view south
Alt-x-3 zooms in
Alt-x-4 moves the view west
Alt-x-5 does nothing
Alt-x-6 moves the view east
Alt-x-7 tilts the level up (bird-view)
Alt-x-8 moves the view north
Alt-x-9 zooms out
Important: Use the numerical pad for this.
When you're satisfied, press shift-F8. This will create screenshot.bmp
in the game folder (e.g. a screenshot from RTWD will be placed in \Return To
Wonderland Deluxe\).
Now to the editing:
Locate screenshot.bmp on your computer and open
it with Paint (comes with Windows, placed under "Start" ->
"Programs" -> "Accessories").
Step 1: Remove the unnessecary parts.
You do this by choosing the icon shown (red arrow).
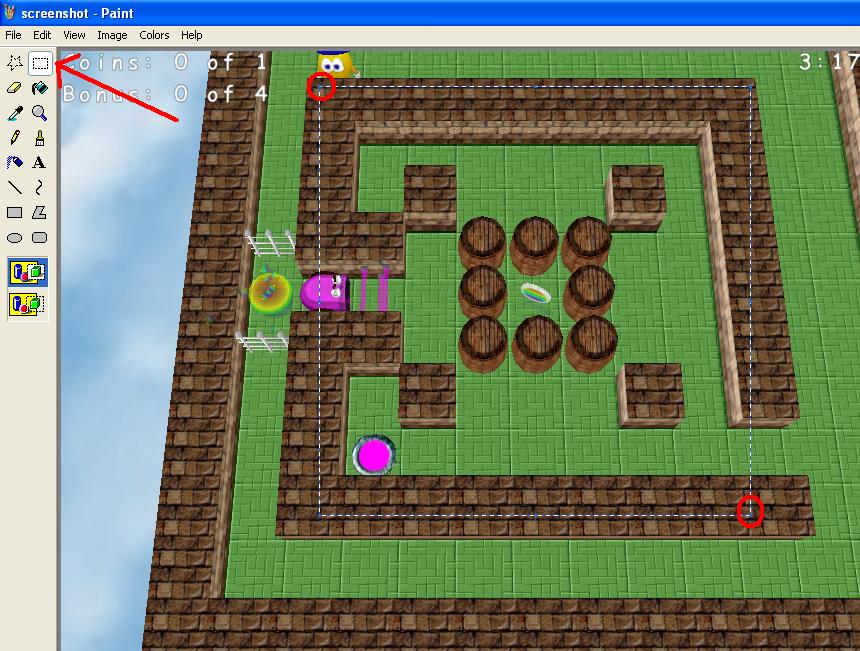
Click on the top left corner of the desired part of the picture and drag the
box to the bottom right corner of the desired part of the picture - not letting
go of the mouse button until you're done.
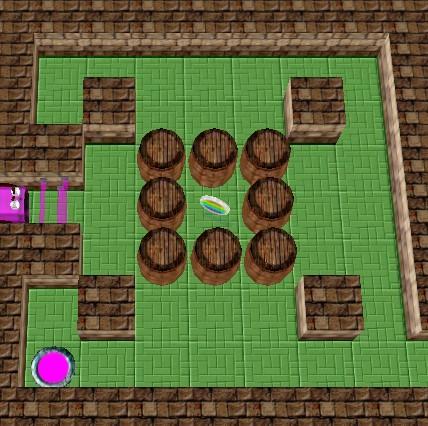
Now choose "Edit" ->" Copy" from the top menu. Choose
"File" -> "New" from the top menu (just say no if you're
asked to save the old picture). Choose "Edit" -> "Paste"
from the top menu. You now have a picture showing only the necessary part of
the level, like this:
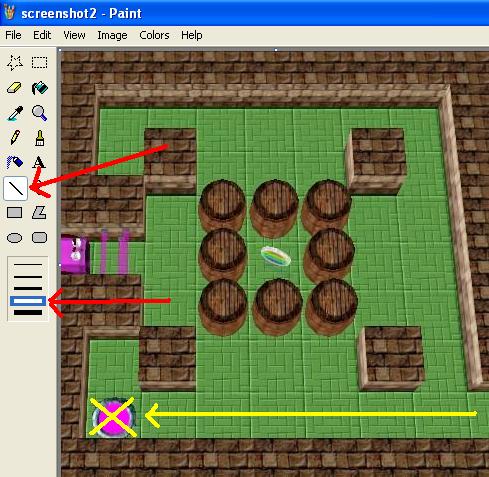
Step 2: Drawing informative lines etc.
Choose your drawing color from the bottom panel. It is of course a good idea to
choose a color that will be clearly visible in your picture.
To draw a straight line use the "Straight line
icon". It's usually best to use the second to thickest line thickness (red
arrows).
To draw a circle use the "circle icon".
Choose the top style (red arrows).
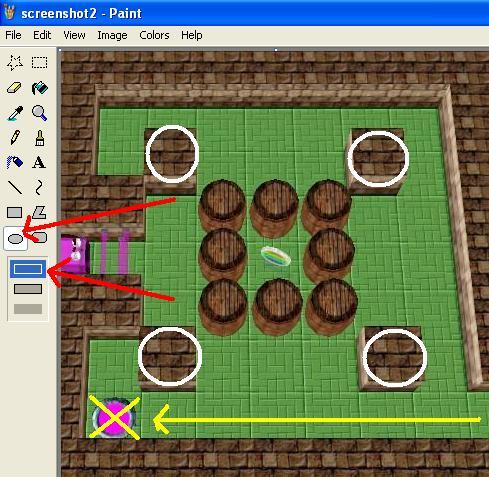
The line thickness of the circle depends on the line thickness of the previous
drawn straight line. If you have made no straight lines yet, the thickness will
be the thinnest possible and hard to see. It's a good idea to always set the
line thickness like shown in the previous picture before drawing a circle.
When you're done drawing, click "File" ->
"Save as" in the top menu. Choose the location and filename
(remember these) as usual and set the file type to .jpg.
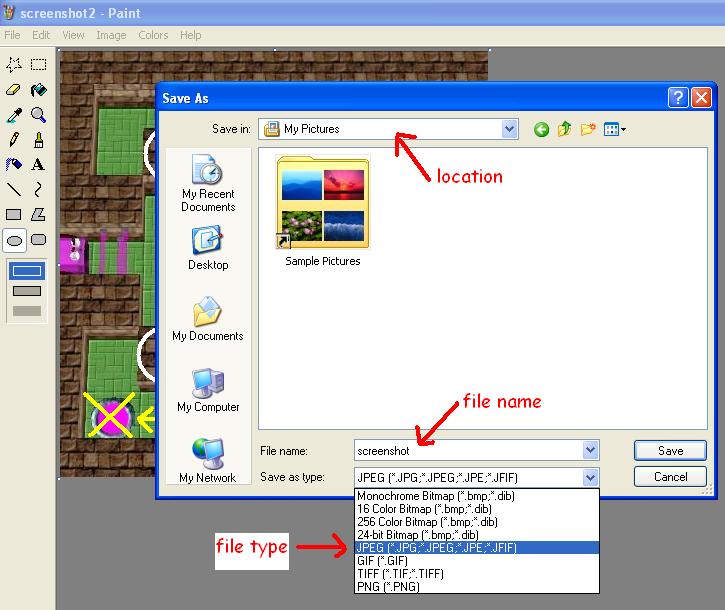
This will save a lot of storage space with hardly any loss of image quality.
Now the posting:
Now you're ready to post your screenshot on the forum. Make a post as usual
(New post or Reply), write your solution and add the screenshot the same way
you add a level (now you need to know the location and filename of your
screenshot).
That's it folks. It might seem like a lot of work, but with a little practice
it's no biggie. ;-)