|
Return to Wonderland
Level Editor
Tutorial #3 - Sizing Levels
Both of our first tutorial levels were 14x14 tiles big. This is the minimum size of a level in Wonderland. It allows for many nice and compact puzzles - but obviously we might wish to create larger levels as well.
In designing the level editor we wanted to incorporate a system to quickly change and re-change the size of the level "on the go", without losing your work. As a result, the controls are versatile, but also require a little bit of practice to get used to. This tutorial will show you the basics.
Start the level editor again and select "New Level". A basic 14x14 level appears. Note that by default it is filled with Floor-tiles, with a border of Wall-tiles. Having a wall as the border makes sense and the editor will try to keep that default when a level is resized.
Now let's make this level wider. Below the Level Name (upper right corner) are two numbers, each with two arrows:
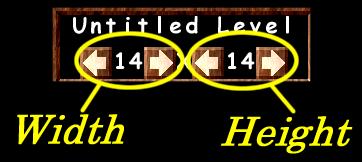
These are the size controls. The current size is shown as 14 (width) x 14 (height). The two arrows are used to control the width and height of the level respectively.
Consider the width controls:
1. Left-clicking on the left-arrow will add space to the left side of the level.
2. Left-clicking on the right-arrow will add space to the right side of the level.
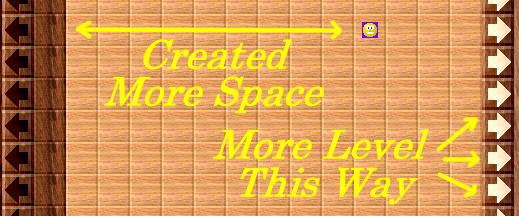
Let's try that out. For reference, place "Stinky" somewhere in the centre of the level. Then left-click on the left-arrow next to the width several times.
You will notice three things happening:
1. As more space is created on the left edge of the level, Stinky "appears" to move to the right.
2. The wall on the right edge disappears. It's not gone, it's just "out of sight", since we can no longer see the entire level in the Main Window.
3. The current width is always displayed, e.g. 16x14 or 20x14.
How do we see the other edge of the level? Notice the set of arrows surrounding the Main Window. The ones pointing right have just lit up! That's because there is more to see toward the right. Left-click on any of the arrows to move your viewpoint toward the right. Eventually (click several times) you will get to the right edge of the level... and there's our missing wall.
Note that as we moved right, the left-arrows also lit up (because now we could also move the viewpoint back to the left again), and when we reached the right edge of the level, the right-arrows turned off again.
Place a few Rainbow coins in the level, and move your viewpoint left and right, to get a feel for moving around in a larger level. You can only ever see 14x14 tiles at once, and need to use the arrows to view the rest.
Now, let's make the level taller as well, by adding space on the bottom of our current level. Think about this, which arrow in your size controls would you use to do this....?
No really, think about your answer before you read on.
That's right, left-click on the right-arrow next to your Height (which still reads 14)! Left-click a few times, then once again practice moving around in the level to see every corner.
Finally, how do we delete space... that is, make the level smaller?
This is one of the few times that you will use your right-mouse-button. Again, to reduce the width:
1. Right-clicking on the left-arrow will delete space to the left side of the level.
2. Right-clicking on the right-arrow will delete space to the right side of the level.
Move your viewpoint to the upper-left corner of the level:
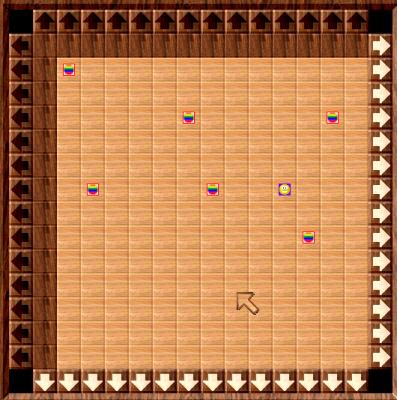
The right- and down-arrows are lit up, as there is more level in those directions.
We want to bring the height back to "14", the minimum, by deleting parts of the level at the bottom. Think about how you would do that....
That's correct, right-click (!) on the right-arrow next to the height measurement (that is, the furthest arrow on the right). You won't notice any change yet, since the part of the level that you just deleted isn't visible. Continue right-clicking, and eventually a wall will appear along the bottom edge:
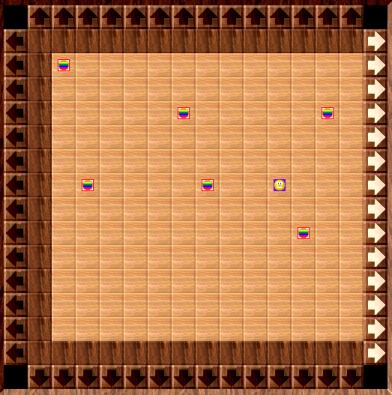
The height is now back to 14. Note that as a result the down-arrows are no longer lit.
Take a moment to play around with the size controls. Make the level larger, smaller, and keep moving the viewpoint to look around the level. Place walls, rainbow coins, or other "markers" in the interior of the level to see how they are affected.
Proper sizing control is something that comes with practice, and sometimes re-sizing a level can have unforseen side-effects. It is therefore best to save a level before doing size-changes, just in case something doesn't quite work out the way you think it should.
To finish this tutorial, resize your level to 14x20, and use what you have learnt to carefully (!) re-create the following level. Note that it contains Stinky, the exit with gates, water, walls, wooden boxes and rainbow coins:
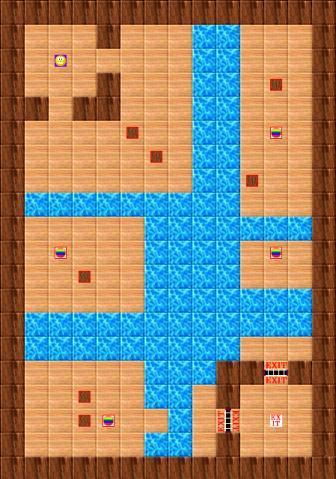
It's an easy "box and water" puzzle using the elements you've learned so far.
Save it, call it "TUT3", and have fun playing around with it.
You're now set to create your own levels. Look through the reference pages to get information on specific tiles, items, and other level content. If you haven't done so already, make sure you read the General Guidelines on level creation.
And above all, have fun!
Click here to return to the main page.
| |

